
Contouring and highlighting have become essential techniques in the makeup routines of many beauty enthusiasts. These techniques allow you to enhance your natural bone structure, sculpting and defining your facial features for a flawless finish. In this comprehensive guide, we’ll delve into advanced techniques for contouring and highlighting, providing step-by-step instructions and tips to help you achieve professional-looking results at home.
Understanding Contouring and Highlighting:
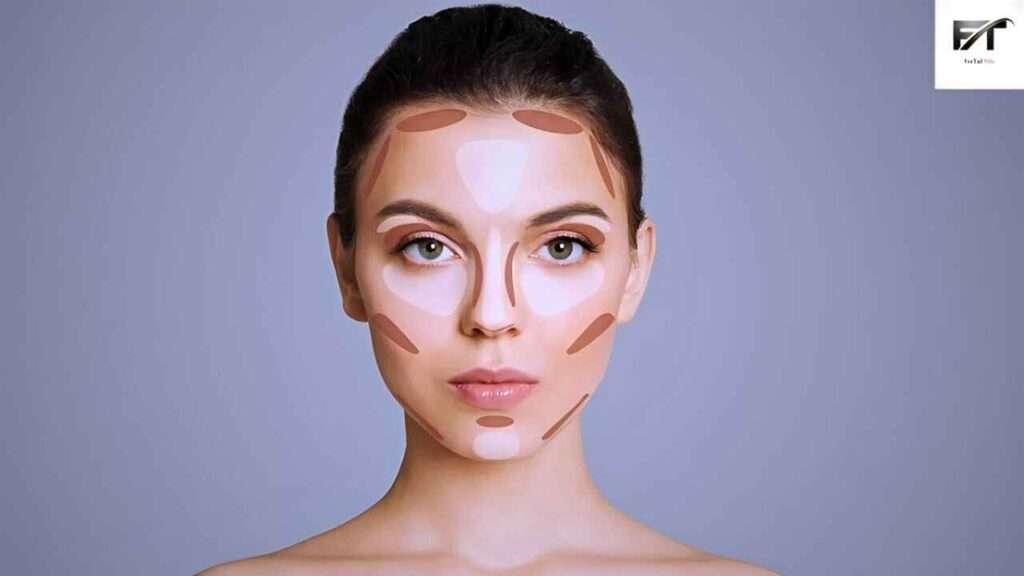
Contouring involves using darker shades to create shadows, giving the appearance of more defined cheekbones, a slimmer nose, and a sculpted jawline. On the other hand, highlighting utilizes lighter shades to bring forward areas of the face, such as the cheekbones, brow bones, and the bridge of the nose, adding dimension and luminosity to the complexion.
Choosing the Right Products:
When selecting products for contouring and highlighting, opt for creamy or powder formulas that blend seamlessly into the skin. For contouring, choose a shade that is two to three shades darker than your natural skin tone. For highlighting, select a shade that is two to three shades lighter.
Step-by-Step Contouring Technique:
- Start by applying your regular foundation evenly across your face to create a smooth base.
- Using a contour stick, cream, or powder, draw a thin line along the hollows of your cheeks, starting from the hairline towards the corners of your mouth. Blend the product using a makeup sponge or brush, ensuring there are no harsh lines.
- Next, contour along the sides of your nose to create the illusion of a slimmer bridge. Use a smaller brush for precision and blend well to avoid any harsh edges.
- To define the jawline, apply contour product along the underside of the jaw, blending downwards towards the neck.
- Lastly, contour along the hairline and temples to add dimension to the forehead.
Step-by-Step Highlighting Technique:
- Apply a highlighting product to the high points of your face, including the tops of your cheekbones, the bridge of your nose, the brow bones, and the cupid’s bow.
- Use a light hand and blend well to ensure a seamless transition between the highlighted areas and the rest of your makeup.
- For an extra glow, you can also apply a small amount of highlighter to the inner corners of your eyes and the center of your eyelids.
Blending and Finishing Touches:
Once you’ve applied both contour and highlight, take a clean makeup sponge or brush and blend any harsh lines for a natural-looking finish. Set your makeup with a translucent powder to prolong its wear and prevent any creasing throughout the day.
Tips for Success:
- Less is more: Start with a small amount of product and build up gradually to avoid overdoing it.
- Use the right tools: Invest in good quality makeup brushes and sponges for seamless blending.
- Practice makes perfect: Experiment with different techniques and products to find what works best for your face shape and skin type.
- Take your time: Contouring and highlighting require patience and precision, so don’t rush the process.
By mastering advanced techniques for contouring and highlighting, you can transform your makeup look and enhance your natural beauty. With practice and the right products, you’ll be able to sculpt and define your facial features like a pro, achieving a flawless finish every time. So go ahead, experiment, and have fun with your makeup routine!
Also Read – How Affirmations Can Transform Your Beauty Game